This is the question most people get stuck on. In this article, I’ll walk you through the entire process of setting up Stripe as a solo service provider — from account creation to receiving your first payment — with no coding required.
By the end of this article, you’ll have a working payment link you can share on your website or social media today.
The Full Picture
Here’s everything you need to do, in order:
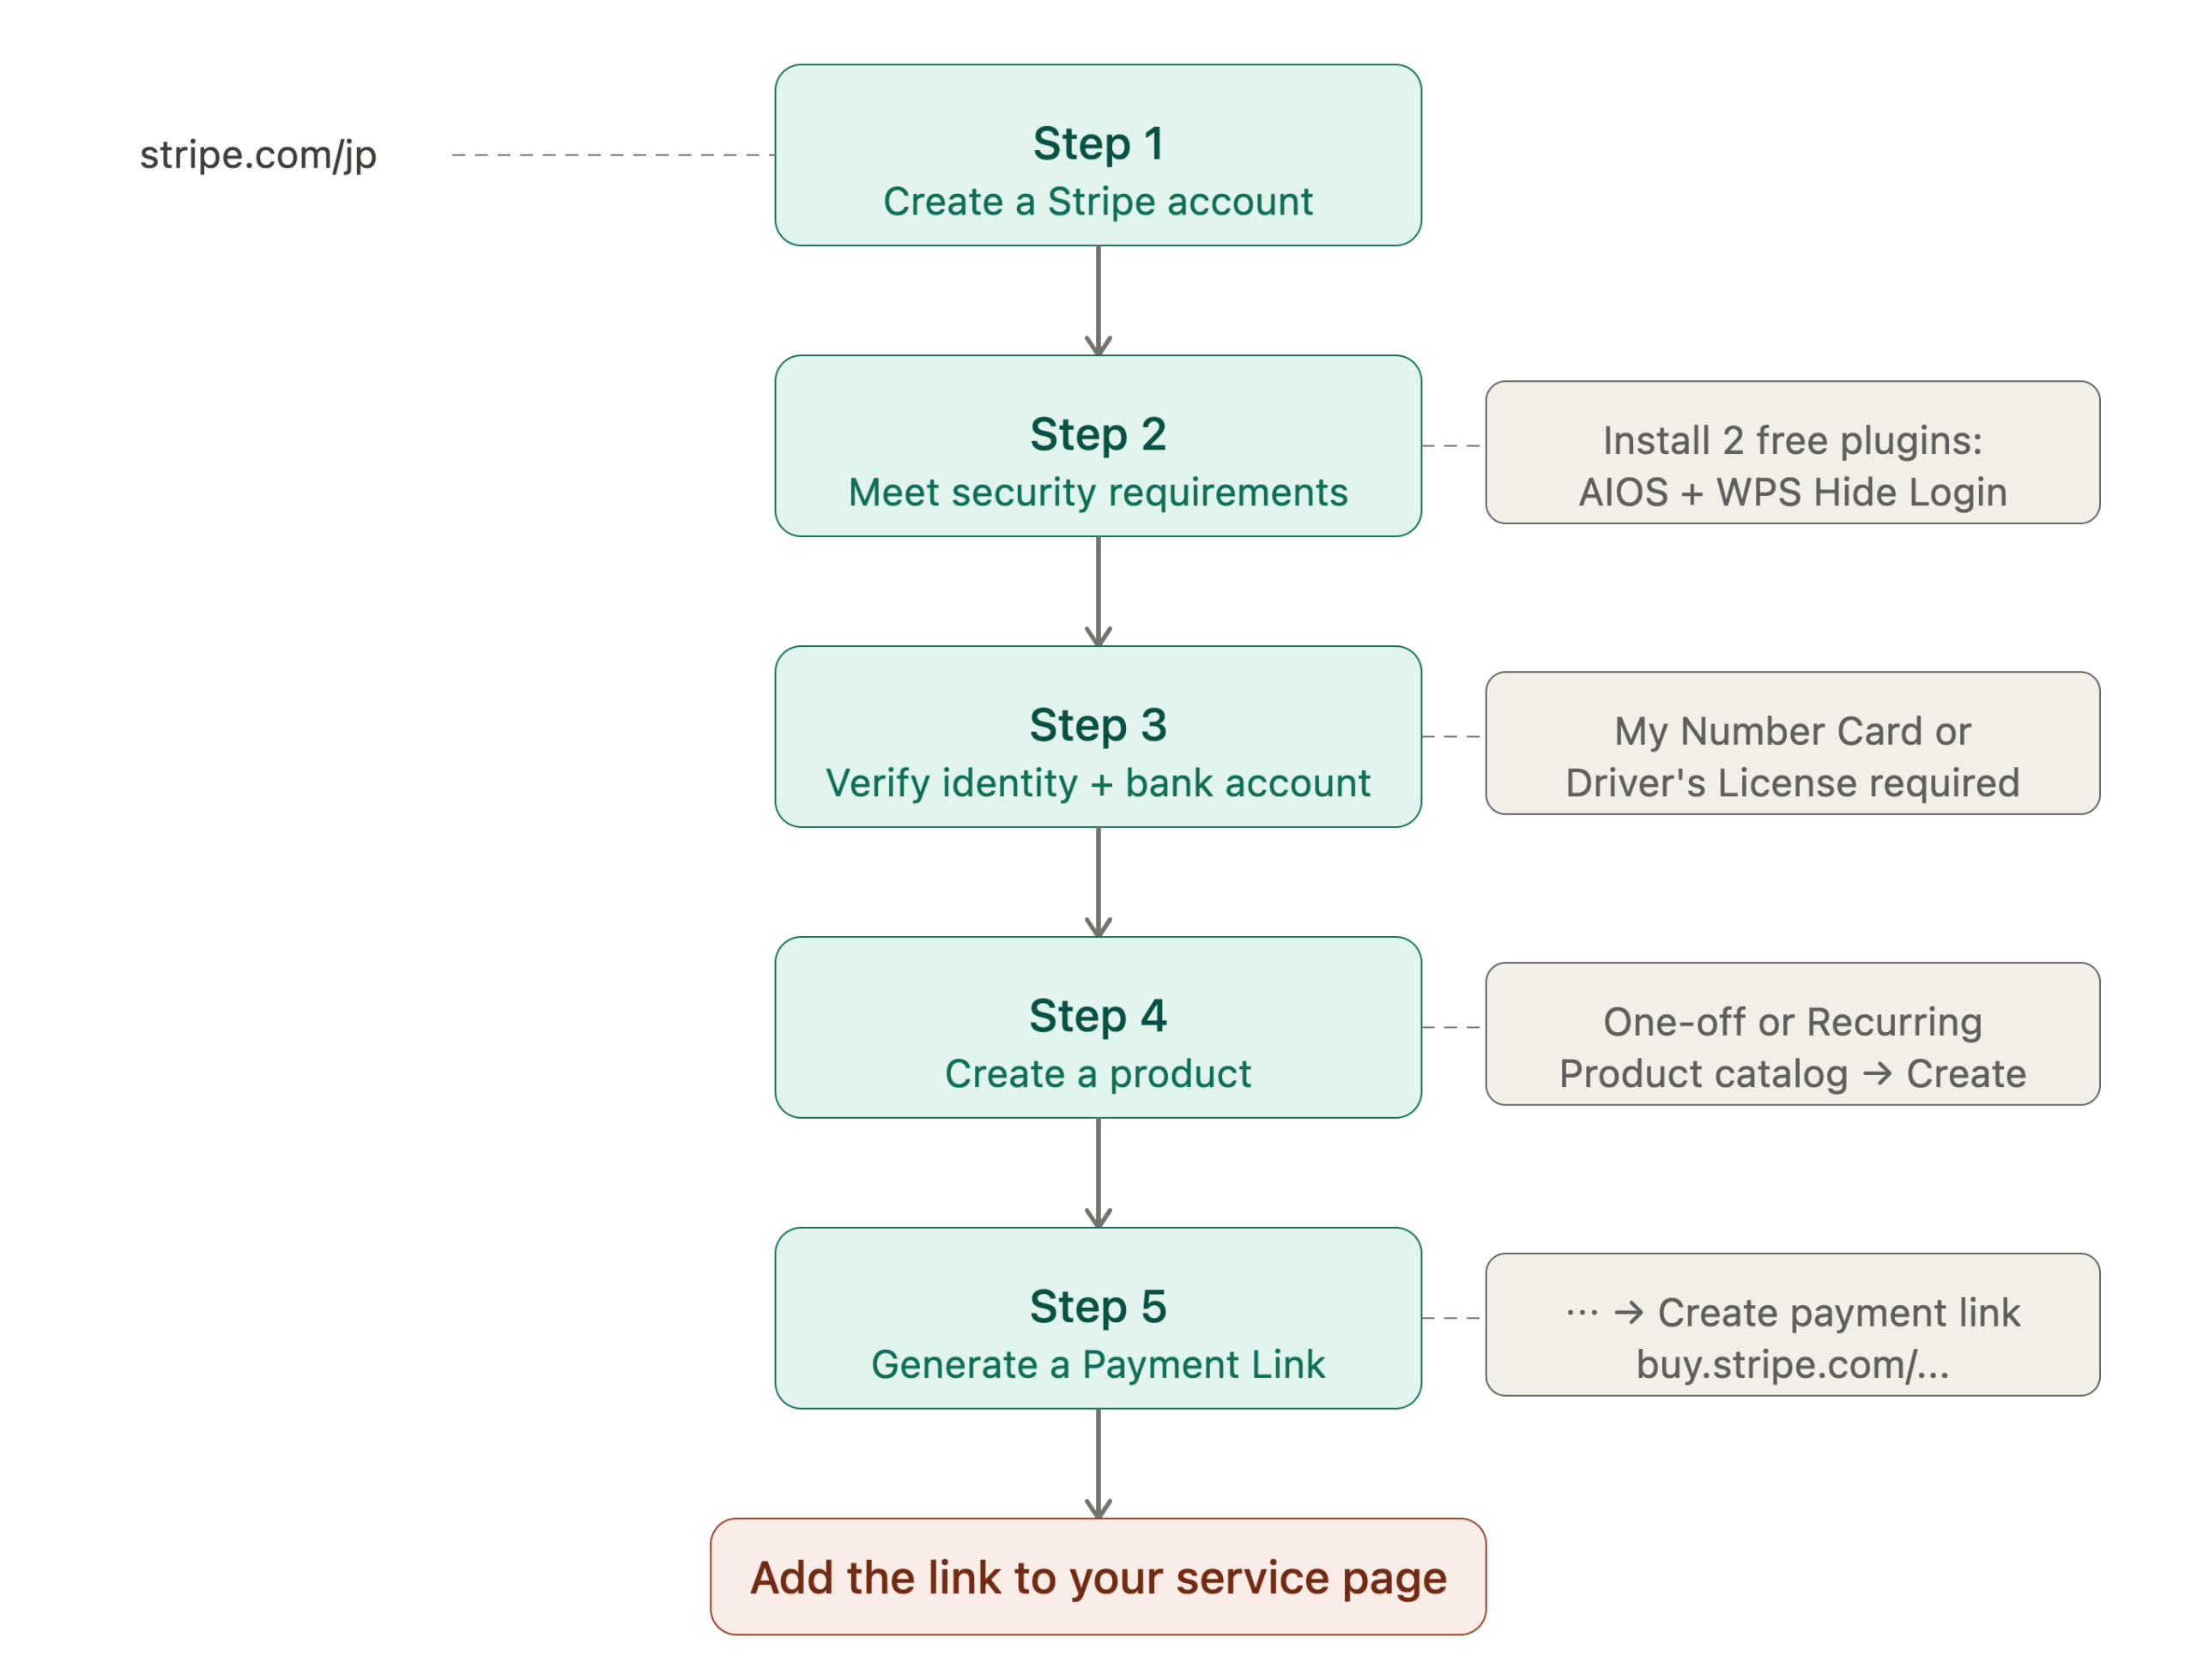
Looks like a lot — but each step is simpler than it looks. Let’s go through them one by one.
Step 1: Create a Stripe Account
Head to stripe.com/jp and sign up.
A few things to watch out for during setup:
- When asked, choose “Get your live account now” — not “Go to sandbox.” The sandbox is just a test environment and can’t accept real payments.
- For category, select Professional services → Consulting services
- For billing method, choose Stripe Payment Links or Invoicing only
- For setup, choose Set up in the Dashboard
Step 2: Meet Japan’s Security Requirements
If you’re based in Japan, Stripe requires you to complete a security checklist from Japan’s Credit Transaction Security Council. Skip this and your account will be flagged as “Multiple capabilities paused” — meaning you can’t accept payments.
The good news: two free WordPress plugins handle almost everything on the list.
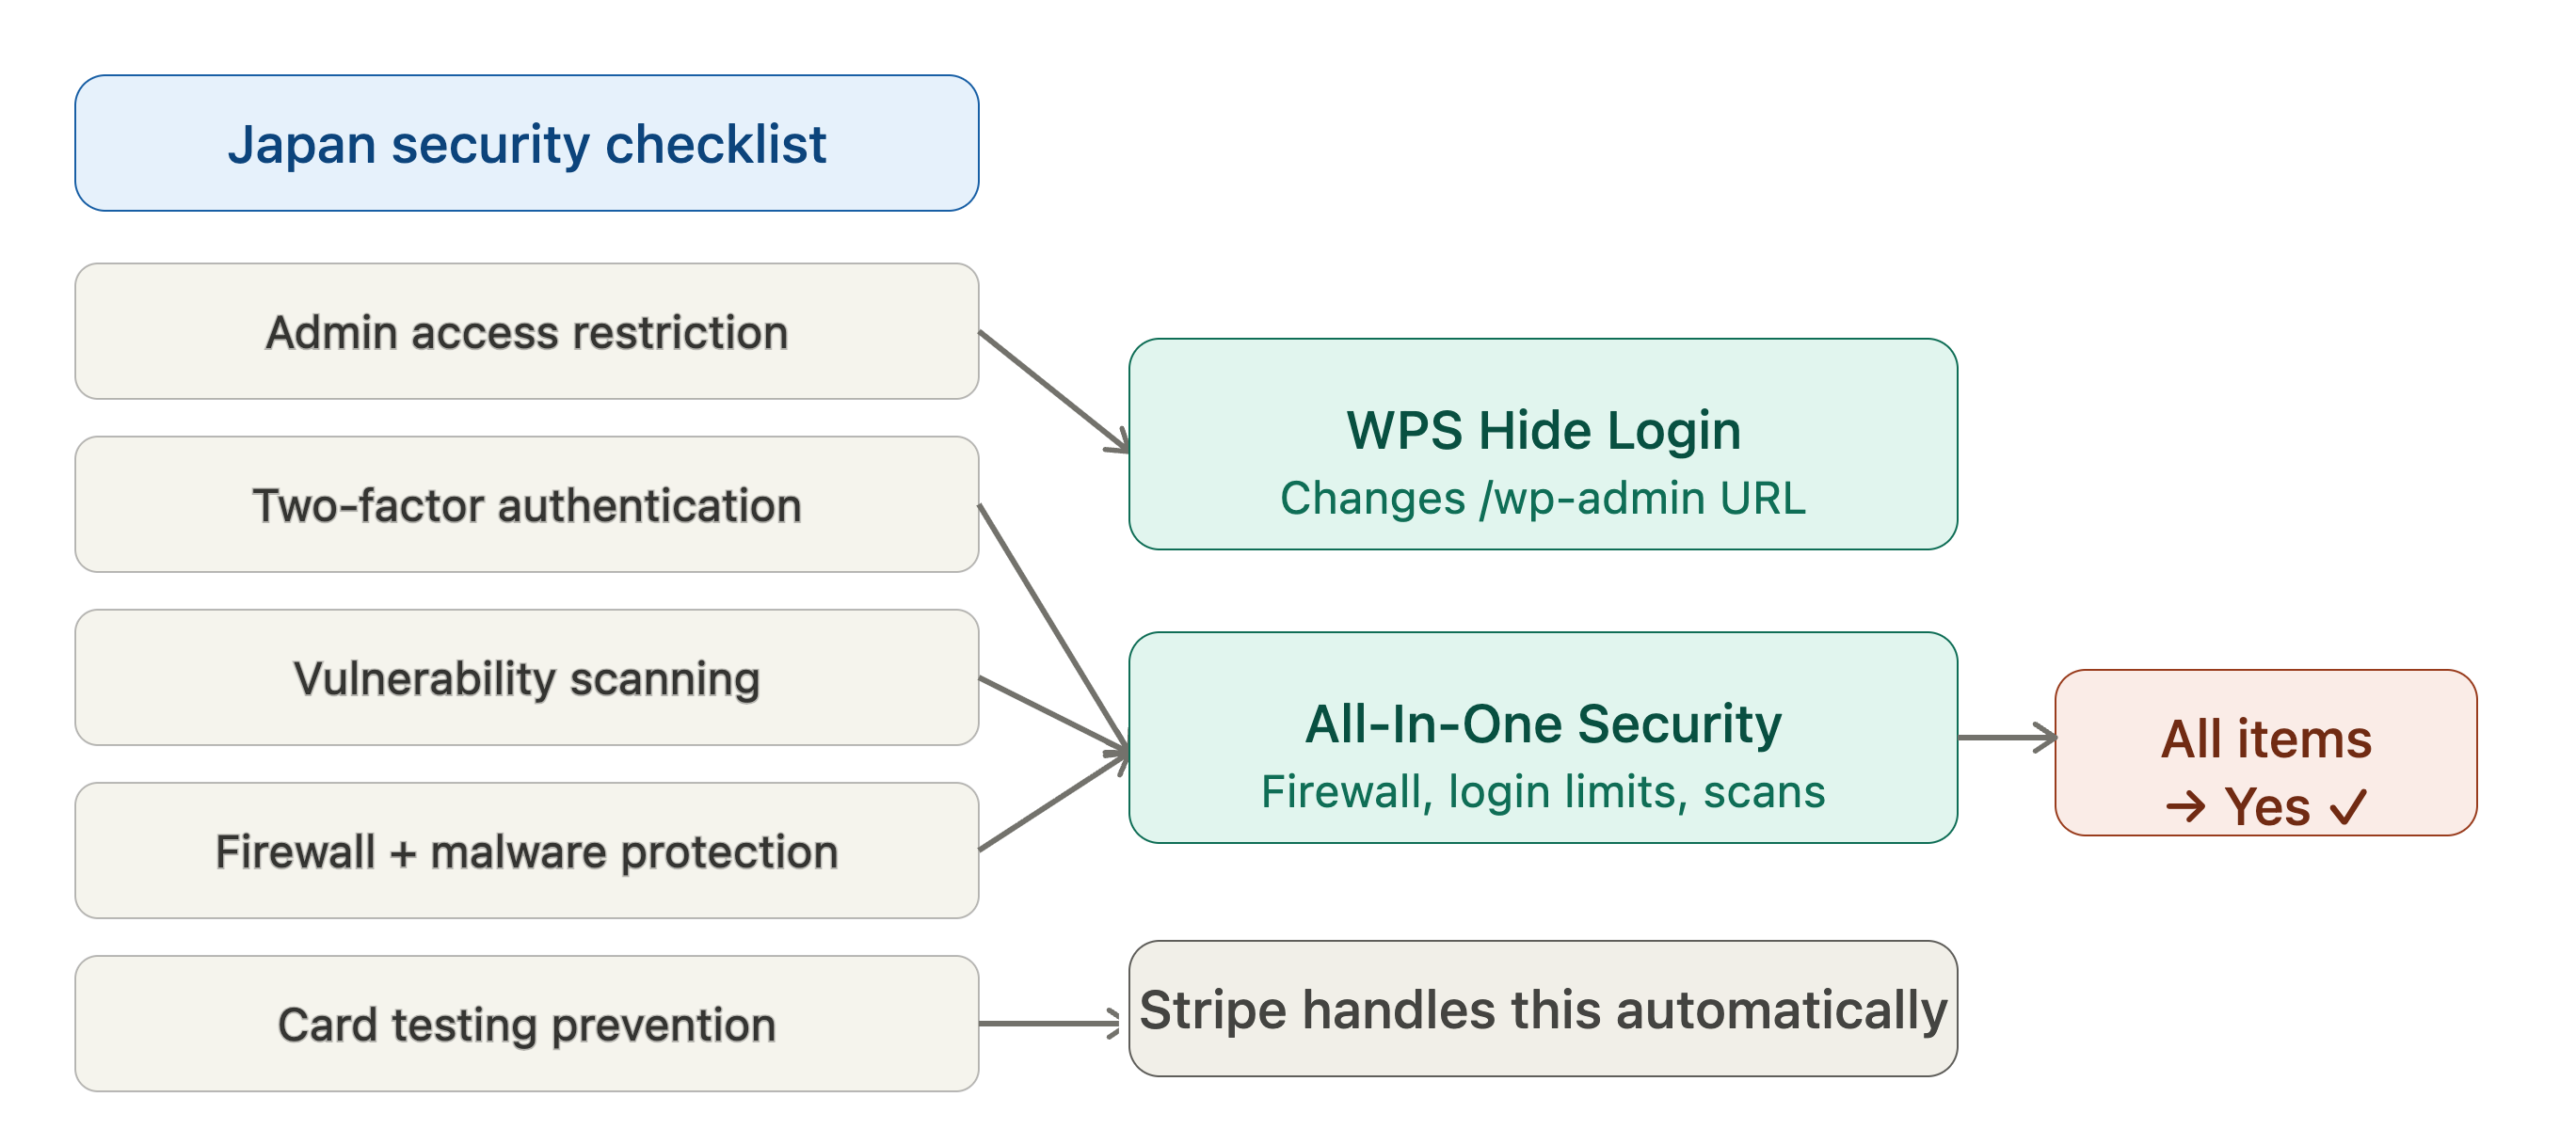
Install both plugins from Plugins → Add New in your WordPress dashboard:
- All-In-One Security (AIOS) — handles firewall, login attempt limits, and vulnerability scanning
- WPS Hide Login — changes your /wp-admin URL to restrict unauthorized access
Once installed, you can answer “Yes” to the admin restriction, two-factor authentication, vulnerability testing, firewall, and malware protection questions. Stripe handles card testing prevention automatically, so you can check “Yes” on that one too.
If you don’t use WordPress, you’ll need to handle these requirements at the server level instead.
Step 3: Verify Your Identity and Add a Bank Account
Stripe requires identity verification before you can receive payouts.
What you’ll need:
- My Number Card (マイナンバーカード) or Driver’s License
- A Japanese bank account
A few tips:
- Enter your account holder name in katakana — it must match your bank passbook exactly
- Review typically takes a few hours to one business day
- While under review, you’ll see “Information in review” — this is normal, no action needed
- For Payout schedule, choose Manual — this lets you initiate transfers on your own timing rather than having them go out automatically
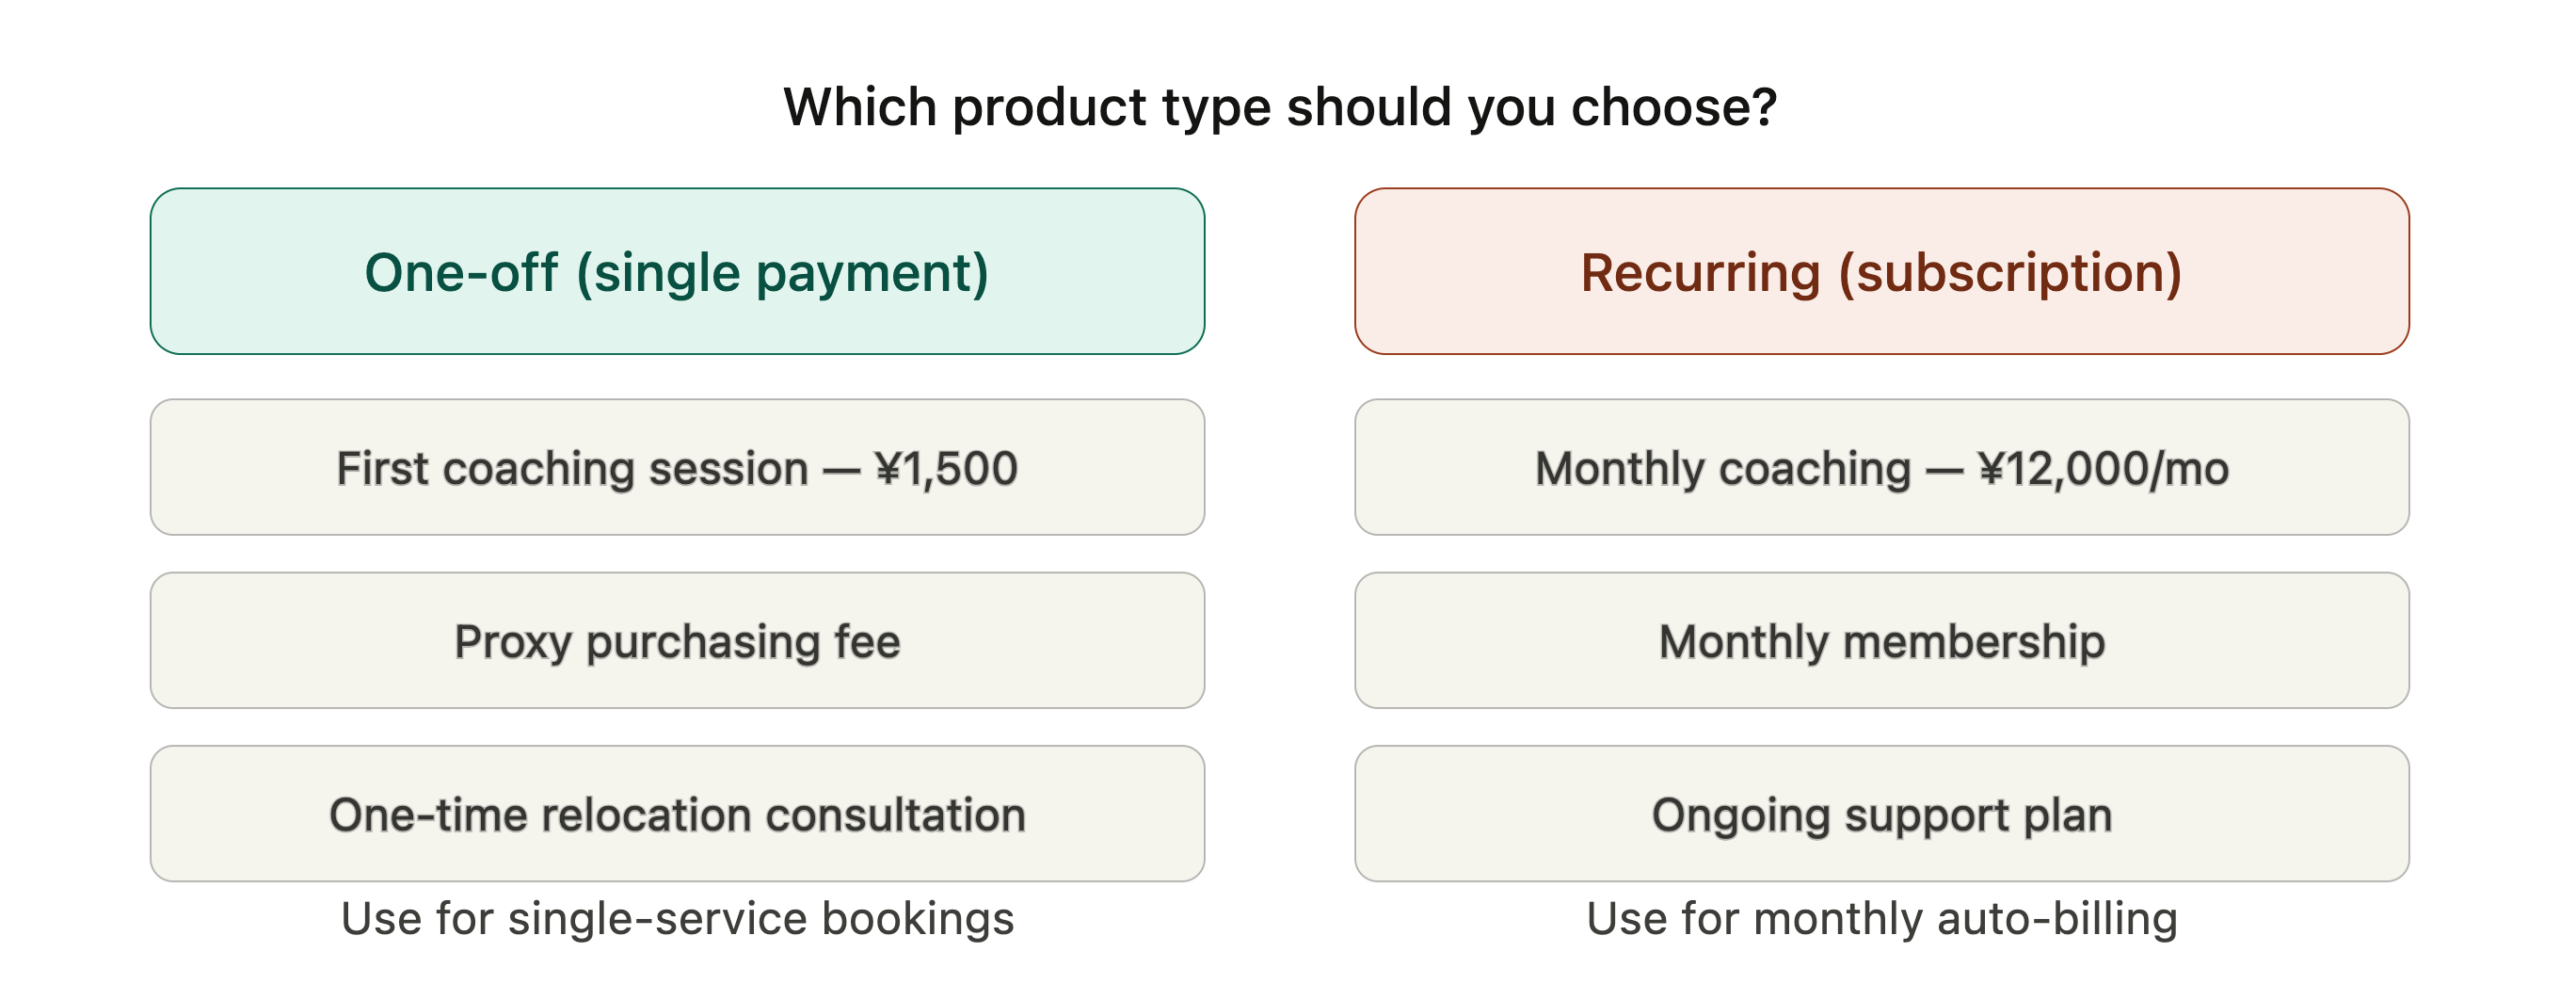
Step 4: Create Your Product
Go to Product catalog → Create product in the Stripe dashboard.
The key decision here is which pricing type to use:
Fill in the following for each product:
- Name — visible to your customers at checkout
- Description — shown on the checkout page and in invoices
- Image — a product photo under 512KB (JPEG or PNG)
- Price — amount and currency (JPY)
- Type — One-off or Recurring
Start with one product. You can always add more later — but launching with one clean offering is better than launching nothing while you perfect ten.
Step 5: Generate a Payment Link
Once your product is created, open it and click ⋯ → Create payment link.
Recommended options to enable:
- ✅ Collect customer names
- ✅ Require phone number
Click Create link. You’ll get a URL that looks like this:
https://buy.stripe.com/xxxxxxxxxxxxThat’s your payment link. Copy it. That URL is now a fully functional checkout page — no website required to start using it.
Step 6: Add the Link to Your Service Page
If you have a website, replace your email or contact link with the Stripe URL:
<a href="https://buy.stripe.com/your-link-here">Book Now</a>Here’s what the full customer journey looks like once everything is connected:
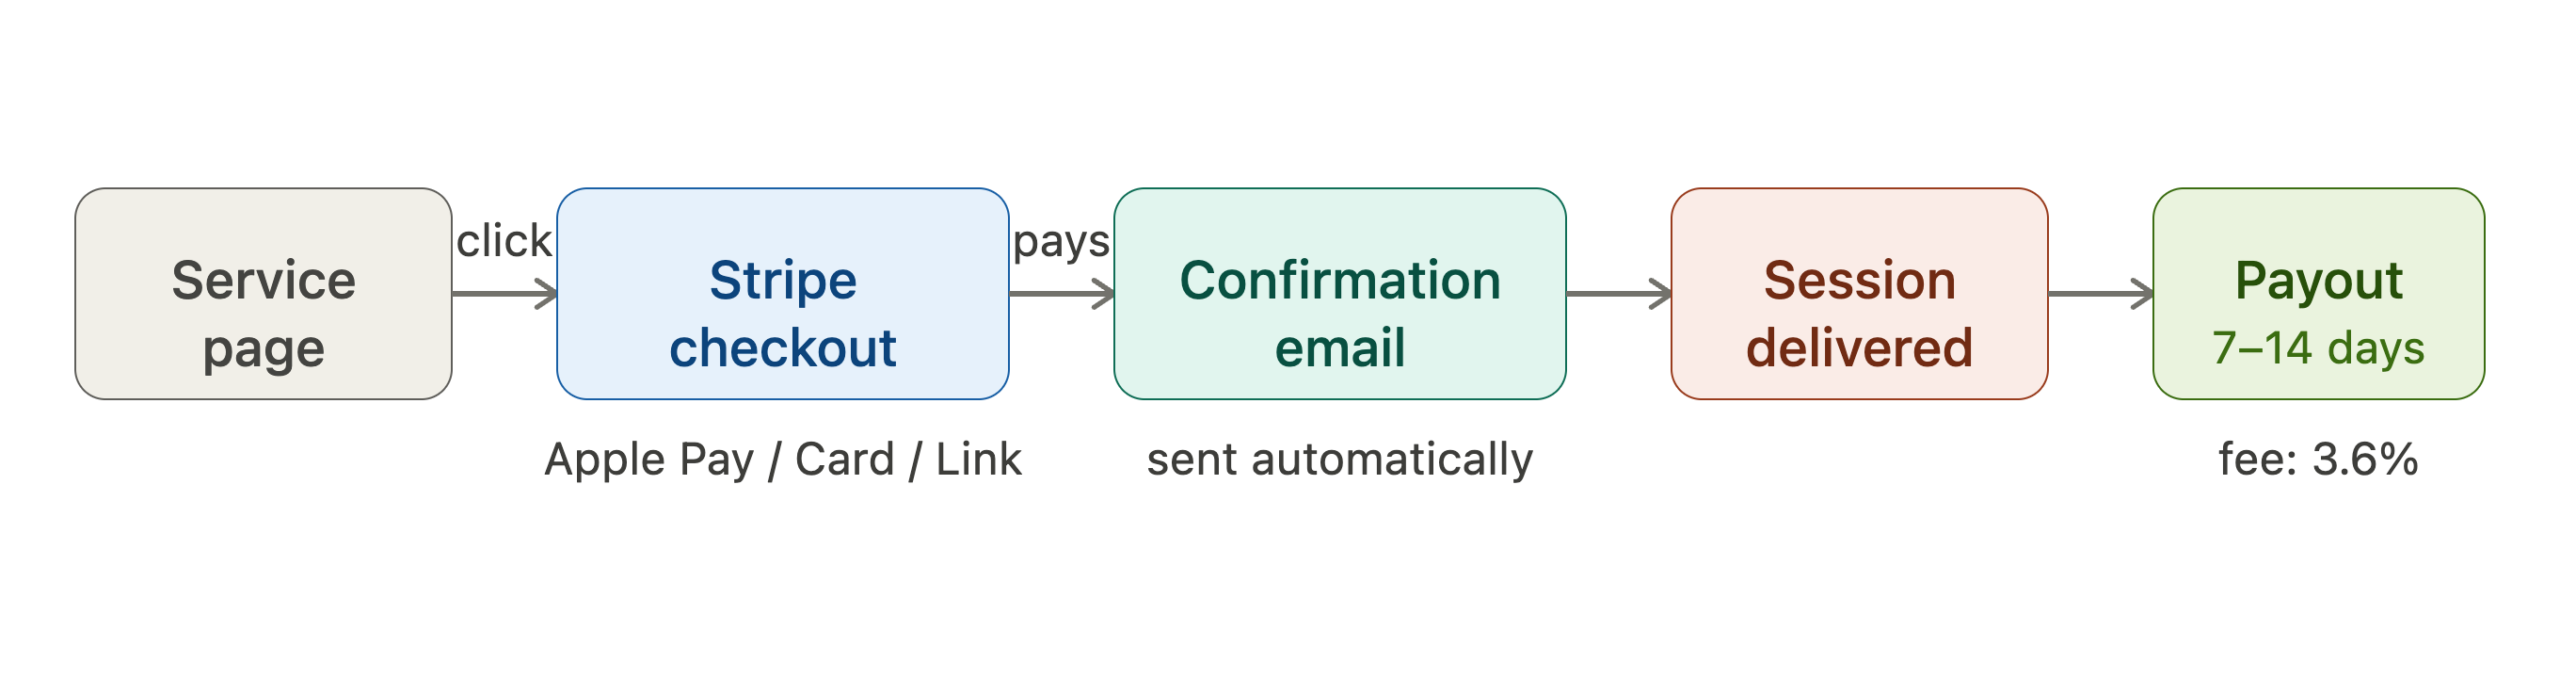
The whole flow — from “Book Now” click to payment confirmation email — happens automatically. You don’t need to do anything manually except show up for the session.
Fees, Tax, and Things to Know
- Transaction fee: 3.6% for domestic Japanese cards (deducted automatically)
- First payout: usually 7–14 days after your first successful payment
- Consumption tax: if your annual revenue is under ¥10M, you’re a tax-exempt business — no need to collect or pay consumption tax
- Income tax: if your side income exceeds ¥200,000/year, you’ll need to file a tax return
- Refund policy: always state this clearly on your service page before someone pays
- Tokusho-ho (特定商取引法): selling services online in Japan may require a legal disclosure page — check whether this applies to you
Today’s Checklist
The first sale doesn’t come from a perfect setup — it comes from having a working one.
- Create a Stripe account at stripe.com/jp
- Install All-In-One Security and WPS Hide Login on WordPress
- Complete the Japan security checklist in Stripe
- Upload your identity document
- Register your bank account
- Create one product
- Generate a Payment Link
- Add the link to your service page or share it directly
One product. One payment link. That’s all you need to start. Everything else — branding, multiple services, subscriptions — can wait until after your first sale.
Tools used: Stripe, WordPress, All-In-One Security (AIOS), WPS Hide Login
Questions? Drop a comment below. 👇


Leave a Reply